Saturday, June 9, 2012

Banana Buttermilk Pancakes

      Almost every Saturday since we've been married, minus a few random ones, and the ones that we've been traveling/moving I've made my husband pancakes. He is a pancake fiend....at least for my pancakes. :) 

For that very reason...that he loves MY pancakes....they don't get old to make. In fact I really love making them...just to see him smile and devour them! Doesn't hurt that they are healthy and delicious as well!! No added Sugar or Oil in them!!


Any of the left overs I let cool, spread out on a cooling rack, and then place in a airtight container or two to a ziplock bag, then into the refrigerator they go. During the next few days I make pancake sandwiches out of them...if they are for a breakfast to go I toss two of them into the toaster to heat up, and then spread peanut/almond butter on them and place fruit (bananas or strawberries or blueberries or a mixture of the all) in the middle and wrap it up in a paper towel to be eaten on the way to work. If they are for a snack later I do the same minus the toasting part and place them in a ziplock. Yummy!! I dare you to try them sometime soon!

Banana Buttermilk Pancakes
makes about 12 pancakes
 Separate Bowl                                                                                                
1 Cup Whole Wheat Flour                                                                                       
1/2 Cup All Purpose Flour                                                 
1/2 Cup Oats                                                                        
1 1/2 tsp Baking Powder                                                                        
1/2 tsp Baking Soda                                                                   
Dash Salt                                                                                      
             
Mixing Bowl
1 Egg, Beaten  
2 Ripe Bananas, smashed with fork
1 1/2 to 2 Cups Buttermilk  or (5 Tbsp Buttermilk Powder & 1 1/2 to 2 Cups Skim Milk)

Optional Additions
Chopped Walnuts, Pecans,  &/or any other fruit (I love adding in blueberries!)

  1. Sift Flours, B. Powder, B. Soda, and Salt together.
  2. Combine Egg, Bananas & milk. Stir dry ingredients into liquid until just combined. Fold in any additional ingredients.
 Pre-heat griddle or large skillet over medium heat and grease lightly. Pour even amounts of pancake batter onto griddle and allow to cook until tops of pancakes are bubbly; turn over and cook until light brown.      

We use plain or vanilla yogurt & fresh fruit on our pancakes, but I promise they are equally delicious with peanut butter, syrup or any of your favorite toppings!!           


My husband helping with the fruit topping/decorating. :)


Tuesday, June 5, 2012

Strawberry Yogurt Oat Scones

 Strawberries are in season around here right now, and I've been buying at least a few pints every week for the past month. The last pint in the fridge was ready ready for the eating so I thought I'd make some fresh strawberry scones. 


For a long time I thought that scones were "fancy food", food you only ate at teas or showers or in sophisticated coffee shops. The older and wiser I get the more I'm realizing that foods that I may have previously deemed "fancy only" are really only just foods...foods that if I want to I can make or buy and eat at any time! So..if you've ever thought that scones were a food only to eat on special occasions, think again! They are actually quick, easy and a delicious breakfast or of course great when hosting a tea party/shower. :)


Ingredients
1 cup all-purpose flour
½ cup oats
½ cup whole wheat flour
1 tsp baking powder
1 tsp baking soda
½ tsp salt
¼ cup brown sugar
Zest of 1 lemon
⅓ cup unsalted butter, cold and cut into cubes
1 cup plain greek yogurt
1 cup strawberries, sliced
1 egg, lightly beaten for egg coating

Lemon Icing
Juice of 1 lemon
Powdered Sugar

Preheat oven to 400F.

Preheat oven to 400 degrees F. Line a sheet pan with parchment paper or baking sheet.
In a large bowl, combine the flour, baking powder, soda, salt, sugar, and lemon zest. Add the cubed butter and use a fork blend to cut the butter into the dry ingredients until it is the size of small beans. Add the yogurt and strawberries and stir with a wooden spoon gently until just mixed together. Do not over mix!!

Lightly flour a surface and place the ball shaped mixture on it. Softly press it into a square about 2 inches thick. Cut into 8 triangle shaped scones. Place onto baking sheet and  brush with beaten egg coating. Bake until golden brown, about 15-17 minutes. Let cool on a wire rack if you can!! :) Drizzle the lemon glaze on top of scone & enjoy!!


Scones are really best the day that they are made but they’ll keep for a few days in an airtight container. ENJOY!!


Thursday, May 31, 2012

Quick & Healthy Granola Bars...

In my opinion people spend WAY too much money buying store bought granola and granola bars. Yes, I'm guilty too...it's pretty easy to just snag a box of granola bars off the shelf at the grocery store. A few months back however I decided to give making granola bars a go...I figured they couldn't be that hard to make, and I could probably create some that were even healthier than the ones I purchased at the grocery store. With this recipe you can make up to two dozen bars!


These granola bars are great as an on the go snack, or in your lunch; my husband wants at least one in his lunch bag each day! You can crumble them up and mix them in with some yogurt and fruit for a quick and healthy breakfast, or over ice cream for dessert. I've given them to friends who are pregnant/have a new baby, for a quick healthy bite to eat when they really need one. My hunger strikes usually right after the gym or while I'm running errands so I've started carrying one in my purse so my blood sugar doesn't plunge, or worse that I decide to buy something quick to eat while I'm out. (Which usually means something not very good for me!) The possibilities are endless!


Quick & Healthy Granola Bars

Work time: 15 min
Total time: 3 hrs (includes cooling time)

Lightly spray a 9x13in baking pan and line with parchment paper! (This is a must do step!)
Preheat Oven to 350F.

Mix together the following ingredients on a rimmed baking tray. Toast in oven for 10-12 min, stirring once.

2 Cups Whole Oats
1 Cup Sliced Almonds or  Chopped Walnuts/Pecans
1 Cup Shredded Coconut
1/4 Cup Sunflower Seeds or Pumpkin Seeds
2 TBS. Sesame Seeds

While the dry mixture is in the oven mix the rest of the ingredients in a large bowl together.

1/2 Cup Agave Syrup or 3/4 Cup Maple Syrup (Agave syrup will make them chewy/ Maple Syrup will make them crunchier).
2 TBS. Olive Oil
1/3 Cup Brown Sugar
1 Cup Dried Cranberries or any other Dried Fruit of your choice (I've used Strawberries, Apricots and Dates so far!)

Once toasted remove from oven. Turn oven down to 300F.

Mix all the ingredients together really well, and then place in parchment lined baking pan. Press mixture firmly down with the back of a spatula around the bottom of the pan until the top is even.


Bake 25-30 min. until golden brown. Let cool on a wire rack for 2 hrs. Grab the edges of the parchment paper and gently remove it from baking pan. Slice into bars & place into bags or cling wrap.  Enjoy!


Recipe Adapted from The Good Neighbor Cookbook

Wednesday, November 16, 2011

Banana bread with love...

It has been entirely too long since I've posted. These past almost 9 months have been like a roller coaster health wise, and I finally feel like it's changing to a fairly smooth ride again. Yay!! Today I decided that it was time to start writing on my blog again...and since I haven't written in a while I decided I'd start with something that makes me feel loved and happy!

I have been eating banana bread since the earliest I can remember. My mother use to make it religiously when I was a child. She'd pack it in my lunch (yes I know now that I was spoiled) with a little butter smeared in-between two slices and no matter when, or what time I ended up dragging it out of my school bag it just made life a little better. It was perfect for a mid school day snack, as a pick me up either between school and whatever sport practice I was practicing for, or as something to tide me over on my way home from said practice.

Nowadays I make it myself...not near as often as my mom did but often enough to make my hubby happy. It's my go to procrastination baking food...yes, I I'll admit it I love love to bake when I should be doing something else. Especially when I should be packing. :)  In my defense though, it is a great food to travel with! One way or the other....there is just something about the smell of it baking that makes me smile, and puts me in a better mood than I was before.


Banana Bread with love
Heat Oven to 200C or 350F


1 1/2 C.  Whole Wheat Flour
1 C. Whole Oats
1 C. All Purpose Bread Flour
2 tsp. Baking Powder
1 tsp Baking Soda
1 tsp cinnamon
dash nutmeg/ginger/cloves

3/4 cup brown sugar 
3 eggs or 4 egg whites
dash of vanilla extract
1/2 cup plain yogurt/applesauce/vegetable oil (your decision)
3 to 4 ripe/mashed bananas
1/2 to 1 cup skim/low fat milk or buttermilk
1/2 cup chopped nuts (pecans/walnuts) - optional
1/2 cup dark chocolate chips - optional but oh so delicious!!


Directions
1. Mix dry ingredients together in a small bowl

2. In a separate mixing bowl mix together wet ingredients

3. Slowly mix the dry ingredients into the wet mixture just enough to combine. Do not beat. Fold in chopped nuts (walnuts are wonderful) &/or choc. chips (1/2 cup) if desired.

4. Mixture should be slightly runny, too thick and your bread will end up dry. I usually start with a half cup milk and add a bit more if needed after ingredients are mixed together.

5. Spray 3 bread loaf pans, 4-5 mini loaf, or 24 muffin pans, and bake in oven for 45min to 1 hr. If baking in muffin pans it should take around 30 min. Toothpick should come out clean when checking loaves.

6. Cool in pan for 10 minutes and then cool completely on wire baking rack. Store lightly covered (towel on counter) or in refrigerator. Can also be frozen for up to 1 month. If freezing, cool completely, wrap in foil and then place in airtight plastic bag in freezer. Enjoy!!

Thursday, October 20, 2011

Butterscotch Dark Chocolate Peanut Butter Bars

 I know the title is a mouthful in and of itself, but how could I leave any of it out?! Butterscotch...Dark Chocolate...Peanut Butter....YUM!!

A few days ago I started craving something sweet, something with butterscotch in it. Craving something with butterscotch isn't anything new for me however, in fact it's been re-occurring often throughout my life. My love for butterscotch I'd say stems from early on in my childhood. My sisters, the other kids in my neighborhood, and I would ride our bikes down to a little hole in the wall grocery store/ truck stop, named the Chuck Wagon, that had a delicious milkshakes and malts. I'd always always get a butterscotch malt...one so thick that you could hold onto the shake with the straw in your teeth and bike with both hands on the handle bars if need be. It was delicious, and ALWAYS worth the 5 mile round trip bike ride!!

Sadly the Chuck Wagon is long gone, as is butterscotch from most menus at milkshake and malt shops. Other than the random Mom & Pop shops, or small town Dairy Queens, its hard pressed to find a butterscotch milkshake. Which means when I've got a butterscotch craving it's up to me to find a way to appease it.  Thus here we are back to present day and my recipe!


I decided that I was going to make some sort of bar with butterscotch in it but wanted more than just butterscotch once I started gathering the supplies to mix the bars together. I opened my fridge for the eggs saw the natural peanut butter and decided it'd be perfect as a substitute for part of my oil/butter; delicious & healthy to boot! Dark Chocolate, the good stuff, in my opinion needs no reason why it's on the recipe list other than it's dark chocolate. To finish the ingredients off I grabbed the quick oats and flour from the cupboard saw my jar of walnuts and decided they would be the perfect final touch. Needless to say I wasn't exactly sure what it'd turn out like but I decided it was worth the risk (how could it not be with those ingredients), and started mixing them all together.

Butterscotch Dark Chocolate Peanut Butter Bars
Makes one 7" by 11" pan

Ingredients:
1/4 C Peanut Butter
1/4 C Unsalted Butter - Softened
1/2 C Brown Sugar
1/2 C Organic Cane Sugar
2 Eggs
1 tsp. Vanilla Extract

1 C All Purpose Flour
1/2 C Quick Oats
2 tsp Baking Powder
Dash of Salt
1/2 C Butterscotch Chips
1/2 C Dark Chocolate Chips
1/2 C Chopped Nuts (I used walnuts)

Directions:


Preheat oven to 350F and spray an medium sized, (I used an 11x7), baking pan with Pam.
Mix dry ingredients, minus the nuts and chips in a mixing bowl. In a slightly larger bowl combine together all of the wet ingredients. Slowly stir the dry ingredients  in with the wet ingredients until completely mixed together. Fold in the butterscotch & dark chocolate chips along with the chopped nuts. Spread the mixture into the baking pan and place in hot oven. Bake for 25-30 min. Cool in pan & then cut into sm. squares to serve.   Enjoy!!


Wednesday, October 19, 2011

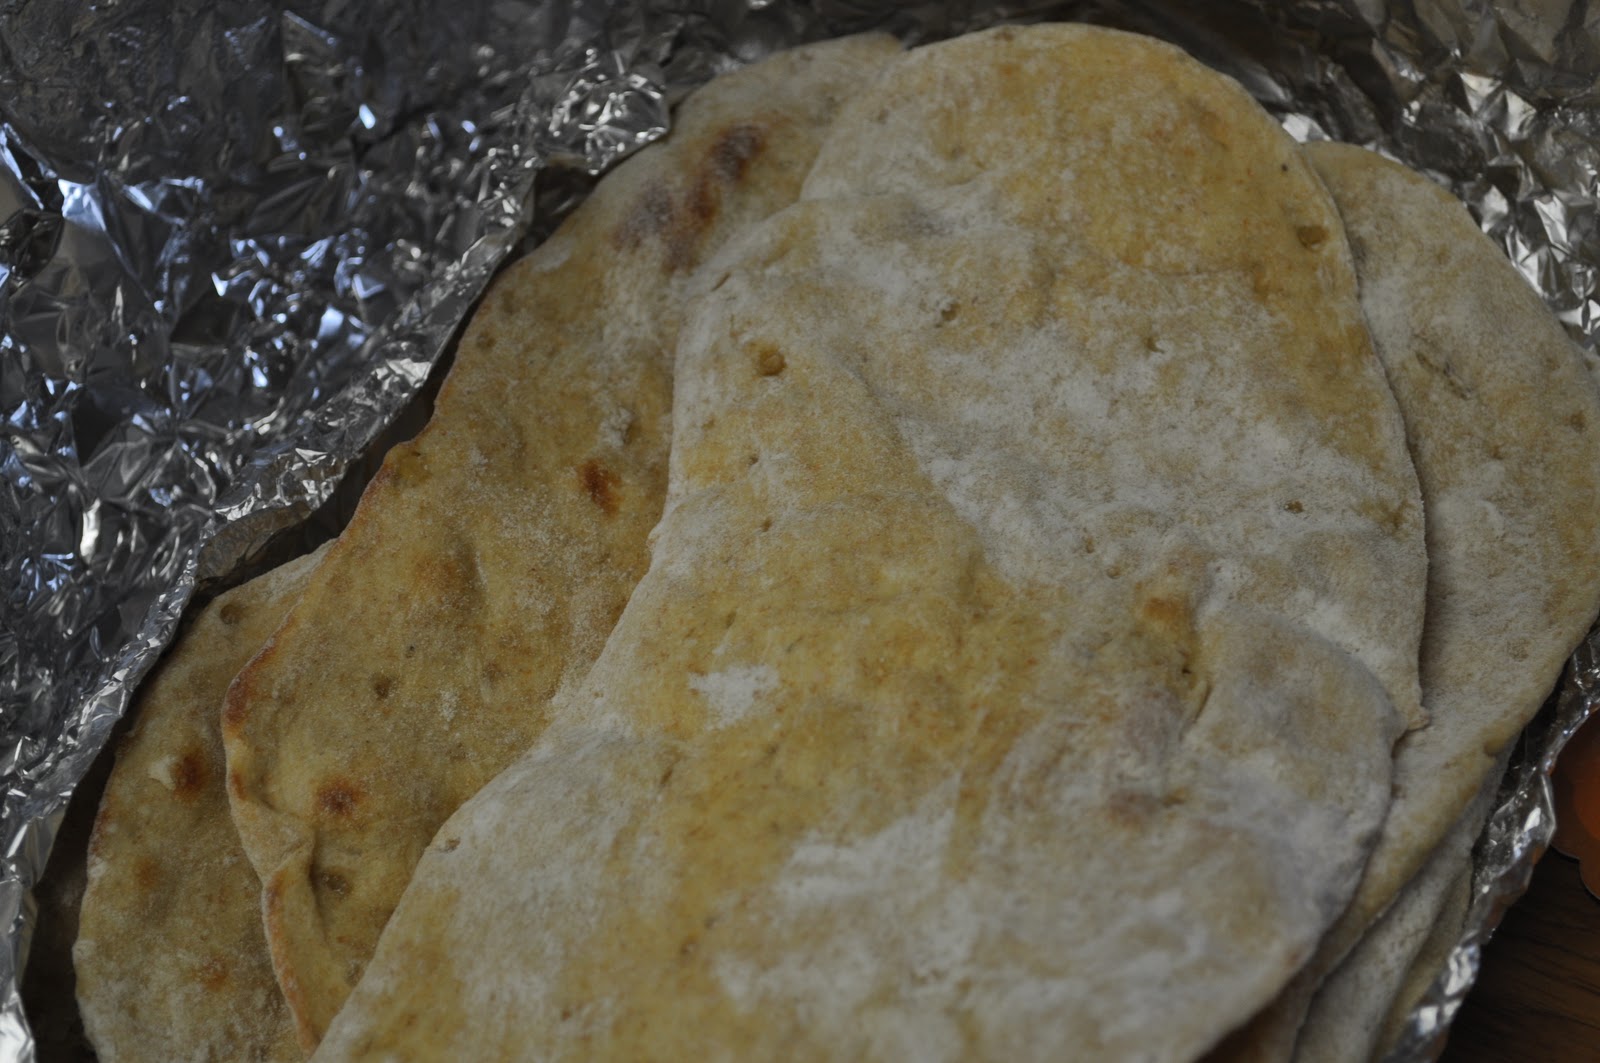
There's Nothing Like Your Own Kitchen. Pumpkin Curry & Baked Naan Bread

I know, I know, I know....it's been over two months since I've posted any recipes. Do I have a good excuse? Hmmmmmm....well I have lots of excuses that's for sure!

After spending the better part of the past two months in the states visiting family and friends I'm back in Korea and starting to settle in again. It's not like I didn't cook while I was away...it's just it isn't the same when your digging around in someone else's cooking space. There are never the same items in someone else's pantry, their spices, bowls, utensils...I could go on and on. Needless to say I am loving being back in my own cooking space; albeit be it a small one. After being gone for so long one of the very first dinners I made....something that is almost my "chicken soup for my soul" go to food lately, was Pumpkin Curry and Baked Naan.  The original recipe for the Curry came from Jula, a friend of mine from Thailand, and it's slowly morphed itself into what it is today. The original Naan recipe I found on Allrecipe.com and tweaked it until I found the consistency I fell in love with.  Mmmmmmm...it's so good to be home!!
Pumpkin Curry

2 Tbsp Red or Green Curry Paste
1 Can Coconut Milk (I use light if I can find it)
1 Tbsp. Brown Sugar
1 Small Squash or Pumpkin, Chopped into inch sized pieces
1/2 lb to 1lb. Pre-Cooked Meat/Tofu of your choice (Duck, Chicken, Pork, Lamb, Shrimp & Tofu are all delicious)
1 Sm. Can Chopped Pineapple, drain before using
Optional: Additional Veggies - Eggplant, Green Beans, 1 Sm. Can Chopped Pineapple (drain before using)
2 to 3 Kaffir Lime Leaves, thinly sliced (use only if on hand, adds flair and a little extra flavor to dish when sprinkled on top when serving)

Directions
In a large stir fry pan mix curry paste with coconut milk & the tablespoon brown sugar. Mix in squash/pumpkin and any other vegetables. Cook at medium low heat until pumpkin is almost fully cooked. Add in pre-cooked meat or tofu.If you find the curry is too thick at any time add in water or broth a little at time until your desired consistency. Once pumpkin/squash is cooked add in can of chopped pineapple and allow curry to combine for a few more minutes. Serve on rice, barley or quinoa. Dish into bowls and sprinkle with the shredded kaffir lime leaves. Naan is also a delicious accompaniment. Enjoy!!


Naan
Time: 2hrs
1pkg. Active Dry Yeast
1 Cup Warm Water
1-2 Tbsp. Brown Sugar
3 Tbsp. Milk or 1/2 & 1/2
1 Egg, beaten
2 tsp. Garlic Salt
3 Cups Bread Flour (I use 1 cup whole wheat/2 cups white flour)
1-2 Tbsp. Olive Oil
1 Tbsp. minced Garlic (optional)


Directions
Heat oven to Max Temp. or Grill to 500F.
In a large glass or plastic bowl, dissolve yeast in warm water and add in sugar. Let stand for about 10 minutes, until foamy. Stir in milk, egg, garlic salt, and enough flour to make a soft dough. Mix in minced Garlic. Knead for 6 to 8 minutes on a lightly floured surface, or until smooth. Place dough in a well oiled bowl, cover with a cloth and let rise for 1 hour, or until dough has doubled in volume.

Punch down dough and then make dough into small balls. Cover and let rise for another 30 mins. Roll each of the balls out 1/4 in thick. Place bread onto baking sheet and put into MAX heated oven. Allow to cook for 3-5 min on each side. Place into large piece of tinfoil to keep warm while cooking others. ***Can also be cooked on a grill; Naan bread will cook much faster on grill, 1-2 min per side. Yum!!


Original Naan Recipe from Allrecipes.com


Saturday, August 6, 2011

Abe's Granola


Mmmmmm….Granola. Pure crunchy goodness when mixed together with yogurt & fresh fruit. How delicious it makes the leftover milk in the bottom of your cereal bowl taste…. even just as a snack all on it’s own it’s such a tasty treat!  It’s an easy fix for a quick breakfast on the go, or is a great go to trail/travel snack. You can bring granola along with you anywhere…even with all of our current travel restrictions. J

Now of course has to come the bummer part… With it being so delicious & it’s travel plus qualities it’s got to have it’s problems right? Yep.  For those who are pinching their pennies store bought granola is super expensive, especially for how little you get in each container. If you can past the $$ issue, then here’s the sticker that in my humble opinion is granola’s biggest strike against it. It tends to be really, really high in calories per serving. Most store bought granolas will run you between 200-300 calories per a ¼ cup serving. Boooo! Such a small portion with that high of a calorie count makes this girl, someone who pays attention to the calories she’s putting into her body, not willing to indulge in the crunchy granola deliciousness on a regular basis.
What to do? Well since my husband LOVES granola & I LOVE my husband, and want to have something on hand that is not only quick and tasty but also healthier for him to boot (and me too), I decided to do my granola recipe homework.  After much searching and testing I found a recipe from Cooking Light that I’ve tweaked to my & my hubby’s liking. Per ½ cup it’s 155 calories unless you add in the flaked coconut (which my husband says is worth it but I don't really care for flaked coconut), and then it’s only 169 calories per ½ cup. Enjoy!!


Abe’s Granola
Serving Size: ½ cup
Serving Per Recipe: Approx. 10

Ingredients:
2 cups regular oats
1/3 cup ground flaxseed or wheat germ
¼ cup chopped walnuts
¼ cup chopped slivered almonds
2 tsp ground cinnamon
½ tsp ground ginger
¼ tsp ground cloves
¼ tsp allspice
1/3 cup orange juice
1/3 cup honey
¼ cup packed brown sugar
2 tsp olive or canola oil
1 tsp vanilla extract
1/3 cup dried cranberries or craisins
1/3 cup raisins
½ cup flaked coconut (optional)
cooking spray
Tinfoil

Directions: Preheat the oven to 300 degrees.
Place the first eight ingredients in a bowl together. If you are adding in coconut mix it in as well at this point. Stir to combine so that seasonings are evenly spread throughout.

In a small saucepan combine the orange juice, honey & brown sugar. Stir mixture over medium heat just until the sugar has dissolved. Remove from the heat and stir in the oil & vanilla extract.


Pour liquid mixture over oats & stir until oats are coated evenly. Spread the mixture out onto a tinfoil covered cookie sheet that has been coated with cooking spray. Bake at 300 degrees for 10 minutes; take out and stir well. Return to oven and bake in 10-minute intervals until golden brown, or to your liking. It usually takes around 30 min max when I make it. Remove from oven & stir in raisins & cranberries. Cool completely and place in individual serving sized zip lock snack bags, or in an airtight container. Use with in a month of making…if it lasts that long! J

Recipe adapted from: CookingLight