Thursday, November 14, 2013

Cinnamon Sugar Coated Mini Pumpkin Muffins


Fall is seriously my favorite time of year....the weather gets cooler making it easier to do more outside, the trees start changing color and out come the warm up your soul foods; soups, stews, baked dishes and delicious baked goods. One of foods that I get super excited about come Fall is the pumpkin...ah who am I kidding....I love me some pumpkin all year round. Fall just allows me to use it more often!

I love cutting, roasting and pureeing our pumpkins after Halloween each year. Even though it is quite a time consuming process it is totally worth it to package it up in freezer bags. Then I have fresh pumpkin to use in whatever we'd like throughout the year to come!! Soups, pies, cookies, muffins, beer...the list goes on and on!! Yummy!!

Thought I'd share with you all one of my favorite pumpkin muffin recipes...super easy and tasty tasty! When you make them mini they are almost like mini baked pumpkin doughnut holes...except healthier!!


                       mmmmmm!

 Cinnamon Sugar Pumpkin Muffins

Preheat oven to 350F

3 Eggs
1/2 cup vegetable oil
1 1/2 cups Brown Sugar
1 Tbsp Vanilla
1 1/2 tsp salt
1 1/2 tsp baking powder
1 cup fresh pureed pumpkin or canned
1 1/2 cups whole wheat pastry flour
1/2 cup quick oats
1 1/2 tsp pumpkin spice

3-5 Tbsp cinnamon sugar (for coating)

Directions:
Mix together Eggs, Oil, Sugar, Vanilla & Pumpkin together in a large mixing bowl. In a separate bowl mix together Salt, Baking Powder, Flour, Quick Oats & Pumpkin Spice. Once dry ingredients have been combined slowly mix them into the wet ingredients until fully combined but don't over mix.
Spoon mixture into well oiled mini muffin tins. Bake for approx. 12 min or until cake tester comes out clean. Allow to cool in pans for 3-5 min before running a knife around the edges and popping them out. Put them into a gallon zip lock bag with cinnamon sugar. I put 12 in at at time and gentle toss to coat. Add additional cinnamon sugar if needed as you work through coating the muffins.
Cool on a drying rack.
*Makes approx. 48 mini muffins. These freeze wonderfully and are great to pop out of the freezer and into a lunch bag! Recipe adapted from King Arthur.


Friday, August 23, 2013

Roasted Hatch Green Chile Tomato Salsa

              Living in the South ie. North Texas has been a major adjustment for this Alaska grown girl...the heat, lack of trees, no mountains, water quality, fresh seafood is an arm and a leg if you can even find it .... my list could go on and on! That all being said though, the South is starting to grow on me... I love the friendliness of the people, the winters are much nicer than home and I love love the availability of fresh produce all the time!

In college I road tripped to New Mexico with some friends to visit their families and was introduced to Hatch green chiles. (I can't believe I lived so long without them now!) It was love at first bite...mmmmmm fresh roasted green chiles are seriously divine! I can't think of a way that I've had them that I haven't liked!

This past weekend one of the grocery stores in town had a "mini mini" hatch green chile fest...really they just had a big roaster that they were roasting green chiles in that were available for purchase and some samples of different items with green chiles in them inside the store. Regardless...they had FRESHLY roasted Hatch green chiles!! Yay!! I've roasted my own many a times and they are work!! To get them straight from the roaster is AWESOME!! You still have to clean them and chop them but to me that is not a problem!! Hubby and I bought a whole box...half hot and half mild as the last ones I bought were spicy spicy we figured if they were we could mix the two.

We cleaned them, seeded them & chopped them...into freezer bags they went (minus the ones we had for dinner in our steak tacos). I left two bags out of the freezer to use right away... one bag I turned into the below salsa recipe and the other I've been using in turkey burgers & eggs!! So many uses for green chiles...if you've never tried them give this and other green chile recipes a go! You won't be disappointed!!


Roasted Hatch Green Chile Tomato Salsa
8-10 Roasted, Cleaned and Diced Hatch Green Chiles (I used a mixture of hot & mild)

(or substitute 2 cans of diced green chiles)
28 oz diced tomatoes
2 tsp garlic powder
2-4 cloves garlic, minced
1/4 cup fresh cilantro, chopped
1/2 med. sized onion, diced
2 tsp salt (or to taste)
2 Tbsp lime juice
 
Mix all ingredients together in a bowl and then using a blender/food processor/immersion blender blend to desired consistency.

*If possible make the day before you are wanting to serve it. Tastes fabulous right away but even better after the ingredients have had an opportunity to meld together!!


Thursday, August 8, 2013

Roasting Vegetables

One of my favorite things to do with vegetables is to roast them. I don't know what it is but the simple act of slicing or cubing vegetables into similar shapes/sizes, and then tossing them with olive oil, kosher salt and some pepper and tossing them on a pan and into a hot oven just makes me smile. Probably because I know how delicious they taste when they come out of the oven 20-40 minutes later!! They are fabulous on their own, used as toppings or stuffed inside a dish of your choosing. Mmmmm! So simple, yet so delicious! With all the vegetables readily available to us at this time of year it would be a shame not to try roasting a few of them! Give it a try... you won't be disappointed!!


Basic Roasted Vegetable Recipe

1. Vegetables of your choosing
2. Salt - I always use Kosher as I think it spreads itself wonderfully over the vegetables
3. Additional Seasonings of your choosing - I love using dried garlic, onions, thyme, basil, rosemary....etc. (if using fresh I recommend tossing the fresh finely chopped herbs in with your vegetables after they have been roasted)

Directions

* Preheat your oven - I like to roast mine at 400-425F (you can slow roast at much lower temps - I roast my tomatoes with  fresh garlic and basil at 350F but it takes much longer)
* Chop your vegetables to similar sizes - this will just help them roast more evenly
* The denser the vegetable the longer it will take to roast; i.e. potatoes - they will take much longer to roast than a tomato, zucchini, mushrooms, etc.
* Once chopped put your veggies into a large bowl and drizzle them with olive oil or the oil of your choosing. A tablespoon or two is plenty. Then toss them to coat evenly.
* Salt them - Start with a small amount - at most for a large bowl of veggies 1Tbsp. You can always add more but you cannot take it away :)
* Add additional dried seasonings; I usually use around 2 tsp of both minced & dried garlic and onion. If I'm going to use fresh herbs I always toss them with the veggies after they are cooked.
* Make sure you leave space between your veggies - they will roast and not steam cook this way.
* Use the top third of your oven. If roasting two pans of vegetables switch/rotate them when you stir them.
* Roast your veggies until they are both golden on the outside and soft/creamy on the inside. Some veggies will take 30 minutes while others may take closer to an hour. Good rule of thumb always check /toss/stir your veggies about 15 minutes into roasting them and then time them accordingly afterwards as to how done they already are. Once you've roasted specific veggies once or twice you will have a much better idea as to how long they will take!
* Taste your veggies when they come out - don't burn yourself though! Sprinkle a bit more salt if you think it needs it and or toss with fresh herbs and serve!

Tuesday, June 18, 2013

Sweet Potato Swiss Chard and Smoked Turkey Sausage Pie


I'd had this post ready to publish this past week and poof...it vanished on me. Ugh. With life as we know it around here lately I just didn't have the time to re-write it until now. Being blessed with a huge box of CSA produce is awesome...but with all the produce showing up at one time it can present some havoc in my fridge and with overload my brain with what I want to do with it all! This past week we were blessed with among a ton of other veggies a large bundle of swiss chard. Normally I go the easy but delicious route of sautéing it with some fresh minced garlic, olive oil and a dash of vinegar once it's wilted. Lately though I've been on a kick of making things that can be served hot or cold...as the weather warms up is so nice to have the option. For this dish the initial inspiration came from Martha Stewart's Swiss Chard Pie and the rest from my brain. The result...mmmmm!! You be the judge and give it a go yourself.
Let me know how it goes!!

Sweet Potato Swiss Chard & Smoked Turkey Sausage Pie
*makes one large pie

Ingredients

pie crust
2 1/2 cups all purpose flour
1/3 cup olive oil
1/2 cup cold water
3/4 tsp coarse salt

1 egg yolk & 1 tsp water, mixed for basting onto top crust

pie filling

1 sweet potato, chopped in 1/2 inch cubes
1/2 red onion, chopped in 1/2 inch cubes
salt & pepper
1/4 tsp red pepper flakes
1/2 tsp onion powder
1/2 tsp garlic powder
1 Tbsp olive oil (to toss together for roasting)

4 cloves garlic minced or 2 tsp minced garlic
1 lg bunch of swiss chard = 5-6 cups, stems diced & leaves torn
1/2 cup grated Parmesan cheese
3 Tbsp all purpose flour
1 lb smoked turkey sausage, diced or crumbled

Directions

pie crust

In a bowl or mixer combine flour, olive oil, cold water, and coarse salt. Stir first with a fork to combine and then knead by hand on lightly floured surface, or with kneading attachment for around 1 minute. Cover dough with damp towel or plastic wrap and let rest at room temperature for 30 minutes. 

pie filling

In a medium sized bowl mix your chopped sweet potato & red onion together with a generous dash or two of salt (I use kosher) & pepper, along with your red pepper flakes, onion powder and garlic powder. Drizzle olive oil over and then mix well. Lay out on parchment covered baking sheet and roast at 425F for 15-20 minutes stirring midway. Once finished let cool slightly and then place in bowl to mix with other ingredients. Turn oven down to 400F.

Heat a large, high sided, skillet over medium heat and then put your chopped turkey sausage and diced stems of swiss chard. Saute until chard begins to soften. Add in leaves and cook, stirring often, until leaves are wilted. Add to bowl where potato onion mixture is. Fold mixture together. Add parmesan and 3 Tbsp flour. Gently mix to combine. Place in pie crust when ready.

to assemble & bake

Spray deep dish pie pan/round cake pan (8in wide x 2in deep) with PAM or oil. Separate dough into two pieces; 2/3rd and 1/3 respectively. Roll out 2/3rd of the dough on a floured surface and then press into pie pan. Put filling on top and then take remaining dough, roll it out and then use it to cover the top of the filling. Press edges together and then baste the top of the pie with your egg yolk water mixture. Make sure to keep off edges of pie pan or it will burn! Take a knife and make small slits across the top of the pie. Bake 40 to 45 minutes at 400F until top is golden brown. Enjoy hot, cold or at room temperature! 

*If baking from frozen bake for 1 1/2 hrs...starting in cold oven.


Thursday, June 13, 2013

Wheat Germ Flax Banana Muffins

Bananas. Mmmmmm. As much as we love and use them in their freshest state I'd have to say that I purposely buy the ones that are a little extra ripe at the grocery store whenever I can. One, because they are usually much much cheaper, and two because then they are already ready for me to use for baking or to freeze for smoothies!!

For healthy snacks for my family and friends I am always trying to come up with different types of tasty and as healthy as possible treats. These muffins are a great go to snack. They are awesome when they come out of the oven but they also freeze amazingly well...I put them in little ziplock bags once they are cooled and straight into the freezer. That way you can pull them out one or two at a time and let them thaw on the counter for 10 or so minutes, or pop them into the microwave for 30 seconds or so & they are as moist and delicious as they were to start with! I am always tossing one or two into my husband's lunch bag in the morning before he goes to work. By the time he's ready for one they are thawed and at at just the perfect temperature to enjoy! Give them a try and see what you think!


Recipe
preheat to 400F - makes approximately 16 muffins or 46 mini (mini muffins are not just for kids!!)

1/2 cup Quick Oats
1/2 cup All Purpose Flour
1/2 cup Whole Wheat Flour
1 Tbsp Baking Soda
3/4 tsp Salt
1/2 cup Wheat Germ
1/4 cup Milled Ground Flax
1/2 cup to 3/4 cup Brown Sugar
1/2 cup Milk (I use Fat Free)
2 Eggs
3 Bananas, Mashed
1/3 Cup Vegetable or Olive Oil - can also substitute applesauce or plain yogurt
1 tsp Vanilla Extract
1/2 cup chopped nuts (optional) - I like walnuts in mine!

Directions
Preheat your oven to 400F.
Mix dry ingredients together in a medium sized bowl and set aside. Put sugar, eggs, oil, vanilla and your mashed bananas into your mixing bowl or large bowl. Add in your dry ingredients until mixture is well combined. Stir in chopped nuts if using.

Spray or oil your baking pans and then scoop in your batter. I've found that the baking times I've listed below work for me in my oven. The best way to know if your muffins/loaves are done is to check them with a tester - if it comes back clean, or to gently press on the top middle of them - if they bounce back once pressed in they are done! Once finished allow them to cool for a few minutes in the pan you baked them in and then move them to a cooling rack to finish cooling!

Mini muffins - 10 to 12 minutes
Regular sized muffins - 15 to 20 minutes
Mini loaves - 30 to 40 minutes
Bread loaf pan - 50 minutes to 1 hr


Monday, June 10, 2013

Broccoli with Ground Turkey Spanakopita

My kitchen is in serious broccoli overload right now...our CSA has been blessing us with loads of the delicious green vegetable these past couple of weeks, and I have been having fun experimenting with new ways of using it. Yesterday I came across a recipe for Broccoli Spanakopita that I thought sounded like a tasty starting point and jumped right into creating my own by tweaking it and adding a few other ingredients.


Start by chopping garlic, onion and broccoli. Then sauté it in a pan for around 10 minutes until slightly soft. Remove from pan and place in a large bowl to cool. Add a dash of salt and pepper - to taste. In the same pan cook your ground turkey with seasonings. Once cooked add into the same large bowl that the broccoli mixture is in. Stir to combine. Once slightly cooled (no longer steaming) add in your eggs and 3/4 cup feta until all is fully mixed together.


Lay one filo sheet down on a flat surface and paint with melted butter. Lay an additional sheet on top of the first and then put 2-3 tablespoons of your turkey broccoli feta mixture and roll up.

 Brush tops of spanakopita with butter and then place seam down on baking sheet. Bake for approximately 20 minutes at 400F flipping halfway through so that filo browns/crisps evenly. Makes ten spanakopita.


Recipe
preheat oven to 400F

2 Tbsp Olive Oil
1/2 onion diced (I used a red onion)
3 cloves garlic minced
1 lg head broccoli
salt and pepper

1 lb ground turkey
1 tsp onion powder
1 tsp garlic powder
dash of red pepper flakes

3/4 cup crumbled feta
2-3 eggs
20+ filo dough sheets - Some of the spanakopita I wish I'd have wrapped one more sheet around to have a more even outer shell.
melted butter - for basting on filo sheets

**Directions written into text above. Enjoy!!


Saturday, June 8, 2013

Rhubarb Strawberry Crumble


 Do you have a food that just makes you happy when you eat it? I do...Butterscotch. But that is for a totally different post! Ha! :) Today I want to share with you a recipe using another of my happiness foods, rhubarb. I'm not sure why it is that rhubarb puts such a smile on my face; perhaps it is because it was such a part of my childhood, or perhaps it's because for me it's been so hard to come by now that I don't live anywhere near where it grows. (Although I am trying to grow some here in Texas....my husband thinks I'm crazy but so far it's still living!!) Regardless rhubarb to me speaks of summer, family, friends and of good good times.
 
My little rhubarb plant!


Rhubarb Strawberry Crumble

 Filling:
¾ cup  brown sugar
1 tsp cinnamon
1/8 tsp ground ginger
1 Tbsp cornstarch
4 cups chopped Rhubarb
2 cups chopped strawberries
1 Tbsp Orange or Lemon Juice (can also add 1 tsp zest if you'd like)

Crumble:

1 cup quick oats
1 cup flour
½ cup melted butter
½ tsp cinnamon
½ cup brown sugar
dash of salt

Directions:
Preheat oven to 350F.
Mix together your brown sugar, cinnamon, ginger & cornstarch. Once mixed add in the rhubarb, strawberries and orange/lemon juice and stir until combined. Place in 11x17 pan, or a similar cake pan that has been oiled.
 In a separate bowl mix together your oats, flour, cinnamon, brown sugar and salt. Add in the melted butter and stir until mixture is well combined. Spread the crumble evenly over the top of your rhubarb strawberry mixture and bake for 40-50 minutes or until edges start to bubble and crumble is golden brown. Eat warm, cold, at room temperature, alone, with ice cream, cream or in any manner that adds happiness to your life and belly. :)


Thursday, May 9, 2013

Strawberry Banana Cake with Cream Cheese Frosting


Why hello there... Yes, yes...I know it's been a while, a loooooong while. These past couple of weeks I've started getting the itch to start blogging again about the food I've been creating. So here I am. I don't promise that I will post weekly, but I will keep posting...

My overall hope and goal is that you my reader will read my blog posts and the recipes within them, take them and recreate them in your kitchen. Please make them your own and share them with your family and friends!!

This recipe is a fabulous one for using up bananas! I am always trying new ways to use my overripe bananas and this one is a keeper.  It is quick and easy to put together; everything is thrown in the same bowl, mixed together and done before you know it! Try it out...I think you'll find it is not only a wonderful day to day treat,  but it is also a great dessert to take to a gathering or brighten someone's day with.

Strawberry Banana Cake with Cream Cheese Frosting

**Makes two 9inch round cakes or one 9x13 sheet cake

3/4 cup unsalted butter, softened or 1/2 cup unsalted butter & 2 heaping tbsp non-fat greek yogurt
3/4 cup white sugar
1 cup brown sugar
3 eggs
3 cups flour
2 tsp vanilla extract
2 tbsp rum (optional)
1 1/2 cups mashed bananas (aprox. 3 bananas)
1 1/2 tsp baking soda
1/2 tsp salt
1 lemon & zest of (can substitute 2 tbsp lemon juice)
1 1/2 cups milk
1 cup diced strawberries

Cream Cheese Frosting
1 tsp vanilla extract
2 tbsp unsalted butter, softened
2 8oz pkgs. cream cheese, softened
Powdered Sugar - to desired consistency
optional - 1 tbsp. rum or milk or 1/2 & 1/2


Preheat oven to 325 F and spray two nine inch rounds with PAM baking spray, or line with parchment paper and lightly grease.

In a mixer or bowl put the sugar, butter, vanilla and rum in and cream together. Also add in the yogurt if using (I find by using the yogurt it make a slightly denser cake but still tastes just as good). Add in the eggs, mashed bananas and lemon juice and zest. Mix well.

Add in the flour, baking soda and salt and stir to combine and then add in the milk while stirring. Mix until smooth. Fold in the strawberries and then pour half into each pan.

Bake for approximately 60 minutes but begin checking at 45 for doneness. Depending on your oven it may take more or less time. Cake is done when tester comes out clean or when cake slightly bounces back when lightly pressed on in middle.

Take cakes out of oven and as soon as possible out of their pans. Place on a drying rack sitting on their parchment paper or on a silpat mat which works great as well. Place in freezer for 30 mins (I flip the cake at 15), and then remove from freezer and allow to cool completely before icing.


To make the cream cheese frosting combine the butter, cream cheese, vanilla & rum/milk/1/2 & 1/2 (if using) and beat until smooth. Add enough powdered sugar for your desired consistency and taste! (I usually end up using at least 3 cups)

Frost and top with fresh berries and almond slivers if desired. Store any leftovers in the fridge.

Recipe adapted from thekitchen.com


Saturday, June 9, 2012

Banana Buttermilk Pancakes

      Almost every Saturday since we've been married, minus a few random ones, and the ones that we've been traveling/moving I've made my husband pancakes. He is a pancake fiend....at least for my pancakes. :) 

For that very reason...that he loves MY pancakes....they don't get old to make. In fact I really love making them...just to see him smile and devour them! Doesn't hurt that they are healthy and delicious as well!! No added Sugar or Oil in them!!


Any of the left overs I let cool, spread out on a cooling rack, and then place in a airtight container or two to a ziplock bag, then into the refrigerator they go. During the next few days I make pancake sandwiches out of them...if they are for a breakfast to go I toss two of them into the toaster to heat up, and then spread peanut/almond butter on them and place fruit (bananas or strawberries or blueberries or a mixture of the all) in the middle and wrap it up in a paper towel to be eaten on the way to work. If they are for a snack later I do the same minus the toasting part and place them in a ziplock. Yummy!! I dare you to try them sometime soon!

Banana Buttermilk Pancakes
makes about 12 pancakes
 Separate Bowl                                                                                                
1 Cup Whole Wheat Flour                                                                                       
1/2 Cup All Purpose Flour                                                 
1/2 Cup Oats                                                                        
1 1/2 tsp Baking Powder                                                                        
1/2 tsp Baking Soda                                                                   
Dash Salt                                                                                      
             
Mixing Bowl
1 Egg, Beaten  
2 Ripe Bananas, smashed with fork
1 1/2 to 2 Cups Buttermilk  or (5 Tbsp Buttermilk Powder & 1 1/2 to 2 Cups Skim Milk)

Optional Additions
Chopped Walnuts, Pecans,  &/or any other fruit (I love adding in blueberries!)

  1. Sift Flours, B. Powder, B. Soda, and Salt together.
  2. Combine Egg, Bananas & milk. Stir dry ingredients into liquid until just combined. Fold in any additional ingredients.
 Pre-heat griddle or large skillet over medium heat and grease lightly. Pour even amounts of pancake batter onto griddle and allow to cook until tops of pancakes are bubbly; turn over and cook until light brown.      

We use plain or vanilla yogurt & fresh fruit on our pancakes, but I promise they are equally delicious with peanut butter, syrup or any of your favorite toppings!!           


My husband helping with the fruit topping/decorating. :)


Tuesday, June 5, 2012

Strawberry Yogurt Oat Scones

 Strawberries are in season around here right now, and I've been buying at least a few pints every week for the past month. The last pint in the fridge was ready ready for the eating so I thought I'd make some fresh strawberry scones. 


For a long time I thought that scones were "fancy food", food you only ate at teas or showers or in sophisticated coffee shops. The older and wiser I get the more I'm realizing that foods that I may have previously deemed "fancy only" are really only just foods...foods that if I want to I can make or buy and eat at any time! So..if you've ever thought that scones were a food only to eat on special occasions, think again! They are actually quick, easy and a delicious breakfast or of course great when hosting a tea party/shower. :)


Ingredients
1 cup all-purpose flour
½ cup oats
½ cup whole wheat flour
1 tsp baking powder
1 tsp baking soda
½ tsp salt
¼ cup brown sugar
Zest of 1 lemon
⅓ cup unsalted butter, cold and cut into cubes
1 cup plain greek yogurt
1 cup strawberries, sliced
1 egg, lightly beaten for egg coating

Lemon Icing
Juice of 1 lemon
Powdered Sugar

Preheat oven to 400F.

Preheat oven to 400 degrees F. Line a sheet pan with parchment paper or baking sheet.
In a large bowl, combine the flour, baking powder, soda, salt, sugar, and lemon zest. Add the cubed butter and use a fork blend to cut the butter into the dry ingredients until it is the size of small beans. Add the yogurt and strawberries and stir with a wooden spoon gently until just mixed together. Do not over mix!!

Lightly flour a surface and place the ball shaped mixture on it. Softly press it into a square about 2 inches thick. Cut into 8 triangle shaped scones. Place onto baking sheet and  brush with beaten egg coating. Bake until golden brown, about 15-17 minutes. Let cool on a wire rack if you can!! :) Drizzle the lemon glaze on top of scone & enjoy!!


Scones are really best the day that they are made but they’ll keep for a few days in an airtight container. ENJOY!!


Thursday, May 31, 2012

Quick & Healthy Granola Bars...

In my opinion people spend WAY too much money buying store bought granola and granola bars. Yes, I'm guilty too...it's pretty easy to just snag a box of granola bars off the shelf at the grocery store. A few months back however I decided to give making granola bars a go...I figured they couldn't be that hard to make, and I could probably create some that were even healthier than the ones I purchased at the grocery store. With this recipe you can make up to two dozen bars!


These granola bars are great as an on the go snack, or in your lunch; my husband wants at least one in his lunch bag each day! You can crumble them up and mix them in with some yogurt and fruit for a quick and healthy breakfast, or over ice cream for dessert. I've given them to friends who are pregnant/have a new baby, for a quick healthy bite to eat when they really need one. My hunger strikes usually right after the gym or while I'm running errands so I've started carrying one in my purse so my blood sugar doesn't plunge, or worse that I decide to buy something quick to eat while I'm out. (Which usually means something not very good for me!) The possibilities are endless!


Quick & Healthy Granola Bars

Work time: 15 min
Total time: 3 hrs (includes cooling time)

Lightly spray a 9x13in baking pan and line with parchment paper! (This is a must do step!)
Preheat Oven to 350F.

Mix together the following ingredients on a rimmed baking tray. Toast in oven for 10-12 min, stirring once.

2 Cups Whole Oats
1 Cup Sliced Almonds or  Chopped Walnuts/Pecans
1 Cup Shredded Coconut
1/4 Cup Sunflower Seeds or Pumpkin Seeds
2 TBS. Sesame Seeds

While the dry mixture is in the oven mix the rest of the ingredients in a large bowl together.

1/2 Cup Agave Syrup or 3/4 Cup Maple Syrup (Agave syrup will make them chewy/ Maple Syrup will make them crunchier).
2 TBS. Olive Oil
1/3 Cup Brown Sugar
1 Cup Dried Cranberries or any other Dried Fruit of your choice (I've used Strawberries, Apricots and Dates so far!)

Once toasted remove from oven. Turn oven down to 300F.

Mix all the ingredients together really well, and then place in parchment lined baking pan. Press mixture firmly down with the back of a spatula around the bottom of the pan until the top is even.


Bake 25-30 min. until golden brown. Let cool on a wire rack for 2 hrs. Grab the edges of the parchment paper and gently remove it from baking pan. Slice into bars & place into bags or cling wrap.  Enjoy!


Recipe Adapted from The Good Neighbor Cookbook

Wednesday, November 16, 2011

Banana bread with love...

It has been entirely too long since I've posted. These past almost 9 months have been like a roller coaster health wise, and I finally feel like it's changing to a fairly smooth ride again. Yay!! Today I decided that it was time to start writing on my blog again...and since I haven't written in a while I decided I'd start with something that makes me feel loved and happy!

I have been eating banana bread since the earliest I can remember. My mother use to make it religiously when I was a child. She'd pack it in my lunch (yes I know now that I was spoiled) with a little butter smeared in-between two slices and no matter when, or what time I ended up dragging it out of my school bag it just made life a little better. It was perfect for a mid school day snack, as a pick me up either between school and whatever sport practice I was practicing for, or as something to tide me over on my way home from said practice.

Nowadays I make it myself...not near as often as my mom did but often enough to make my hubby happy. It's my go to procrastination baking food...yes, I I'll admit it I love love to bake when I should be doing something else. Especially when I should be packing. :)  In my defense though, it is a great food to travel with! One way or the other....there is just something about the smell of it baking that makes me smile, and puts me in a better mood than I was before.


Banana Bread with love
Heat Oven to 200C or 350F


1 1/2 C.  Whole Wheat Flour
1 C. Whole Oats
1 C. All Purpose Bread Flour
2 tsp. Baking Powder
1 tsp Baking Soda
1 tsp cinnamon
dash nutmeg/ginger/cloves

3/4 cup brown sugar 
3 eggs or 4 egg whites
dash of vanilla extract
1/2 cup plain yogurt/applesauce/vegetable oil (your decision)
3 to 4 ripe/mashed bananas
1/2 to 1 cup skim/low fat milk or buttermilk
1/2 cup chopped nuts (pecans/walnuts) - optional
1/2 cup dark chocolate chips - optional but oh so delicious!!


Directions
1. Mix dry ingredients together in a small bowl

2. In a separate mixing bowl mix together wet ingredients

3. Slowly mix the dry ingredients into the wet mixture just enough to combine. Do not beat. Fold in chopped nuts (walnuts are wonderful) &/or choc. chips (1/2 cup) if desired.

4. Mixture should be slightly runny, too thick and your bread will end up dry. I usually start with a half cup milk and add a bit more if needed after ingredients are mixed together.

5. Spray 3 bread loaf pans, 4-5 mini loaf, or 24 muffin pans, and bake in oven for 45min to 1 hr. If baking in muffin pans it should take around 30 min. Toothpick should come out clean when checking loaves.

6. Cool in pan for 10 minutes and then cool completely on wire baking rack. Store lightly covered (towel on counter) or in refrigerator. Can also be frozen for up to 1 month. If freezing, cool completely, wrap in foil and then place in airtight plastic bag in freezer. Enjoy!!

Thursday, October 20, 2011

Butterscotch Dark Chocolate Peanut Butter Bars

 I know the title is a mouthful in and of itself, but how could I leave any of it out?! Butterscotch...Dark Chocolate...Peanut Butter....YUM!!

A few days ago I started craving something sweet, something with butterscotch in it. Craving something with butterscotch isn't anything new for me however, in fact it's been re-occurring often throughout my life. My love for butterscotch I'd say stems from early on in my childhood. My sisters, the other kids in my neighborhood, and I would ride our bikes down to a little hole in the wall grocery store/ truck stop, named the Chuck Wagon, that had a delicious milkshakes and malts. I'd always always get a butterscotch malt...one so thick that you could hold onto the shake with the straw in your teeth and bike with both hands on the handle bars if need be. It was delicious, and ALWAYS worth the 5 mile round trip bike ride!!

Sadly the Chuck Wagon is long gone, as is butterscotch from most menus at milkshake and malt shops. Other than the random Mom & Pop shops, or small town Dairy Queens, its hard pressed to find a butterscotch milkshake. Which means when I've got a butterscotch craving it's up to me to find a way to appease it.  Thus here we are back to present day and my recipe!


I decided that I was going to make some sort of bar with butterscotch in it but wanted more than just butterscotch once I started gathering the supplies to mix the bars together. I opened my fridge for the eggs saw the natural peanut butter and decided it'd be perfect as a substitute for part of my oil/butter; delicious & healthy to boot! Dark Chocolate, the good stuff, in my opinion needs no reason why it's on the recipe list other than it's dark chocolate. To finish the ingredients off I grabbed the quick oats and flour from the cupboard saw my jar of walnuts and decided they would be the perfect final touch. Needless to say I wasn't exactly sure what it'd turn out like but I decided it was worth the risk (how could it not be with those ingredients), and started mixing them all together.

Butterscotch Dark Chocolate Peanut Butter Bars
Makes one 7" by 11" pan

Ingredients:
1/4 C Peanut Butter
1/4 C Unsalted Butter - Softened
1/2 C Brown Sugar
1/2 C Organic Cane Sugar
2 Eggs
1 tsp. Vanilla Extract

1 C All Purpose Flour
1/2 C Quick Oats
2 tsp Baking Powder
Dash of Salt
1/2 C Butterscotch Chips
1/2 C Dark Chocolate Chips
1/2 C Chopped Nuts (I used walnuts)

Directions:


Preheat oven to 350F and spray an medium sized, (I used an 11x7), baking pan with Pam.
Mix dry ingredients, minus the nuts and chips in a mixing bowl. In a slightly larger bowl combine together all of the wet ingredients. Slowly stir the dry ingredients  in with the wet ingredients until completely mixed together. Fold in the butterscotch & dark chocolate chips along with the chopped nuts. Spread the mixture into the baking pan and place in hot oven. Bake for 25-30 min. Cool in pan & then cut into sm. squares to serve.   Enjoy!!


Wednesday, October 19, 2011

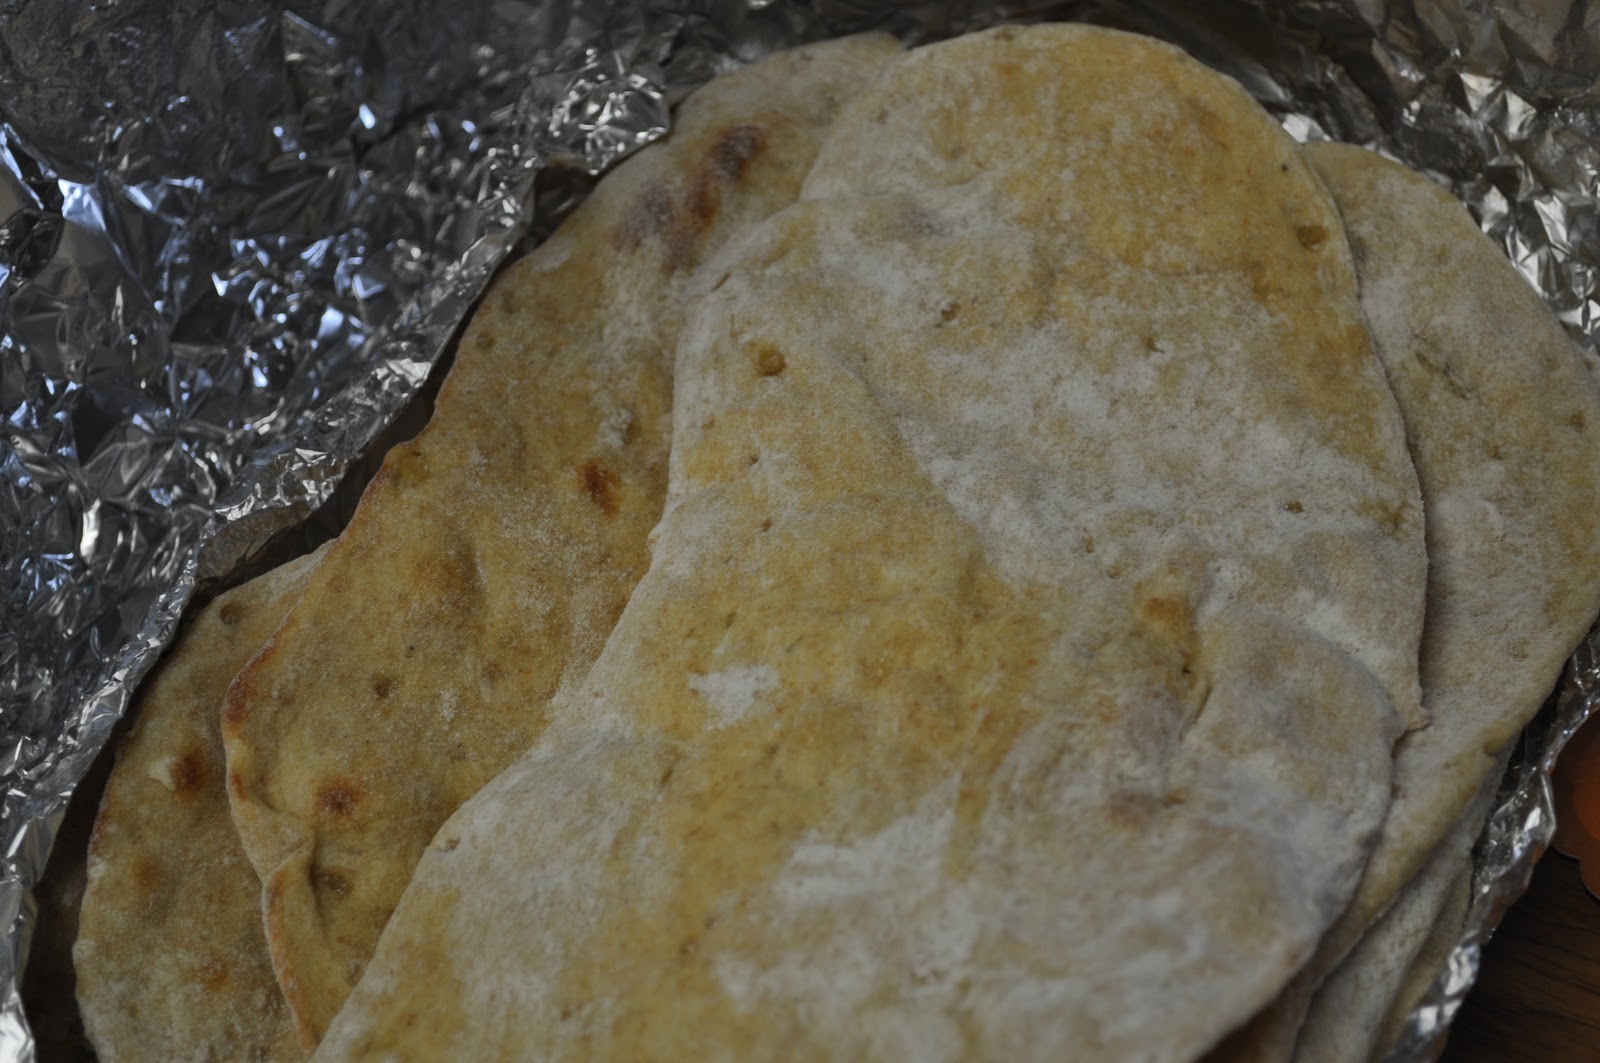
There's Nothing Like Your Own Kitchen. Pumpkin Curry & Baked Naan Bread

I know, I know, I know....it's been over two months since I've posted any recipes. Do I have a good excuse? Hmmmmmm....well I have lots of excuses that's for sure!

After spending the better part of the past two months in the states visiting family and friends I'm back in Korea and starting to settle in again. It's not like I didn't cook while I was away...it's just it isn't the same when your digging around in someone else's cooking space. There are never the same items in someone else's pantry, their spices, bowls, utensils...I could go on and on. Needless to say I am loving being back in my own cooking space; albeit be it a small one. After being gone for so long one of the very first dinners I made....something that is almost my "chicken soup for my soul" go to food lately, was Pumpkin Curry and Baked Naan.  The original recipe for the Curry came from Jula, a friend of mine from Thailand, and it's slowly morphed itself into what it is today. The original Naan recipe I found on Allrecipe.com and tweaked it until I found the consistency I fell in love with.  Mmmmmmm...it's so good to be home!!
Pumpkin Curry

2 Tbsp Red or Green Curry Paste
1 Can Coconut Milk (I use light if I can find it)
1 Tbsp. Brown Sugar
1 Small Squash or Pumpkin, Chopped into inch sized pieces
1/2 lb to 1lb. Pre-Cooked Meat/Tofu of your choice (Duck, Chicken, Pork, Lamb, Shrimp & Tofu are all delicious)
1 Sm. Can Chopped Pineapple, drain before using
Optional: Additional Veggies - Eggplant, Green Beans, 1 Sm. Can Chopped Pineapple (drain before using)
2 to 3 Kaffir Lime Leaves, thinly sliced (use only if on hand, adds flair and a little extra flavor to dish when sprinkled on top when serving)

Directions
In a large stir fry pan mix curry paste with coconut milk & the tablespoon brown sugar. Mix in squash/pumpkin and any other vegetables. Cook at medium low heat until pumpkin is almost fully cooked. Add in pre-cooked meat or tofu.If you find the curry is too thick at any time add in water or broth a little at time until your desired consistency. Once pumpkin/squash is cooked add in can of chopped pineapple and allow curry to combine for a few more minutes. Serve on rice, barley or quinoa. Dish into bowls and sprinkle with the shredded kaffir lime leaves. Naan is also a delicious accompaniment. Enjoy!!


Naan
Time: 2hrs
1pkg. Active Dry Yeast
1 Cup Warm Water
1-2 Tbsp. Brown Sugar
3 Tbsp. Milk or 1/2 & 1/2
1 Egg, beaten
2 tsp. Garlic Salt
3 Cups Bread Flour (I use 1 cup whole wheat/2 cups white flour)
1-2 Tbsp. Olive Oil
1 Tbsp. minced Garlic (optional)


Directions
Heat oven to Max Temp. or Grill to 500F.
In a large glass or plastic bowl, dissolve yeast in warm water and add in sugar. Let stand for about 10 minutes, until foamy. Stir in milk, egg, garlic salt, and enough flour to make a soft dough. Mix in minced Garlic. Knead for 6 to 8 minutes on a lightly floured surface, or until smooth. Place dough in a well oiled bowl, cover with a cloth and let rise for 1 hour, or until dough has doubled in volume.

Punch down dough and then make dough into small balls. Cover and let rise for another 30 mins. Roll each of the balls out 1/4 in thick. Place bread onto baking sheet and put into MAX heated oven. Allow to cook for 3-5 min on each side. Place into large piece of tinfoil to keep warm while cooking others. ***Can also be cooked on a grill; Naan bread will cook much faster on grill, 1-2 min per side. Yum!!


Original Naan Recipe from Allrecipes.com